I can't believe my baby is already turning 3!! We are planning a race car party because he is soooo into cars of any type right now. Here is his invitation...I would love to take all the credit, but I adapted it from an idea I saw on Pinterest:) NOw I must go prepare for the party! I will post pics after the party....
Tuesday, May 7, 2013
Tuesday, January 8, 2013
Grand Opening of our booth atUniversity Pickers!!
It is finally here! The Grand Opening of University Pickers Antique Store was last Saturday and this is a few pictures of our booth! My friend Dawn and I have a business called She Sells Details and we do lots of crafty things for the home and for children. Our friend Allison at Vintage Charm and Restoration (the fabulous painted furniture you see pictured here) asked us to join her in her booth and accessorize! We have had so much fun and there are so many talented vendors there! The owners are the sweetest couple...stop by if you are in the Huntsville area!
Wednesday, December 12, 2012
Chevron Chair cushions made from fabric scraps
Tuesday, August 7, 2012
A cool new bed!
My husband is the bomb. We were perusing Pinterest and ran across a pin for an amazing Pottery Barn bed ....you may know the one. The Eli Fort bed $$$$....enough said. Super cool, but not a super cool price. I kept looking and we found this.....
AAAAA-MAZING! This super cool lady posted a knock-off version of this bed AND a link to the plans to make it!! My dear hubby casually said "print the plans" so I did and just two days later it was finished!! I couldn't believe it! Thanks, http://ana-white.com/2012/05/plans/clubhouse-bed Ana White, for your awesome plans! And to Jaime at That's my Letter...you guys are great for sharing:) My kids thank you!
I have to brag on my man, too....he worked hard and made this a girly version of the fort for our little princess! I made the sign out of an old cabinet door and wrote a line from "guess How Much I Love You?" because that is one of our family's favorite bedtime books:)
Monday, June 18, 2012
A Bug themed 2nd Birthday!
We decided on a bug theme for Cohen's 2nd birthday. It was a really fun party and easy to plan! This is a shot of the sugar cookies that have become a family tradition at birthdays around here:) They always match the theme....I have accumulated quite a few cookie cutters over the years, so in between parties they are often used by the kiddos to make "cookies" out of playdough! These are grasshoppers...
"Centipede" grape skewers....
More sugar cookies...butterflies, snails, and grasshoppers. I got the bags at hobby lobby and tied them up with raffia:) Twine would also be cute....
Table setting.....a few nets and bugs from the dollar store...hotdogs coming up!
I made this bug shirt with fabric scraps and button eyes and a little ric-rac...
Drink station included "beetle juice" for the kids...(juice boxes)
Dirt cupcakes with gummy worms....plastic bugs decorated the tables....
Digging for real worms.....the shovels and rakes came from the dollar store and the worms from Walmart! We filled a wheelbarrow with dirt and the kids had a blast digging!
The Very Hungry Caterpillar! (I saw this on pinterest and had to use it!)
I used my cricut to cut the letters for the "bug spray" bottles....really just some dollar store bottle filled with water. The kids wore antennae headbands that I made with pipe cleaners and plastic headbands and they were the "bugs". They had a blast spraying each other!
Some of the little "bugs".....hope this inspires some fun "bug" parties out there for your little buggies!! Thanks for checking out my blog:)
Thursday, February 16, 2012
Upcycled Chandalier and other fleamarket finds...
I am not sure why, but I just love this little picture. I picked it up at a thrift store the other day because it just kept calling my name:) I think I am going to work it in to a gallery wall for our master bedroom...we shall see:)
Speaking of the Master...this is an updated pic. I got this good ol' brass chandelier for free (holla!) and I painted it with several shades of off white and ecru. I picked up the greenery 1/2 off at Hobby Lobby and voila! A new light fixture for literally a couple of dollars! The mirror by our bed was a hand me down that I painted and then I added an old book (I tore the hard cover off because I liked the way it looked) and added a printed burlap covered vase with a few flowers ( $2 for the vase at HL, $2 for the flowers at Walmart). Ahhh...design on a dime:)
Friday, February 10, 2012
Greater love has no one than this, that he lay down his life for his friends." ~John 15:13
Happy Valentines Day! If you are a Pinterest junkie like me, then you may have seen a version of this cutie floating around, only it had a small white pumpkin where I have a nest and a beaded red heart. I also added the mini bunting, because I love buntings! Here is what you will need to make this:
-One medium sized grapevine wreath (about $4.00 at Hobby Lobby, but these go 1/2 off all the time) -One bag of Spanish moss (I liked the bright green for this project, also purchased at 50% off)
-One birds nest (they come in a pack of 2 at HL, so you will have more for another spring project:)
-One beaded red heart ornament (30% off in Valentine section)
-red ric rac (.99 in scrapbook section, also 50% off...ok you get the picture....I like 50% off)
-scrap red and white polka dot fabric -old book page -burlap -hot glue and gun
Just take your wreath and work in small sections, applying the hot glue and then adding a bunch of the Spanish moss. Don't be stingy with the moss....it goes a long way. Also, this will make an EPIC mess, so be forewarned:) After covering most of the front with moss ( I skipped the back) hot glue your nest to the inside bottom of the wreath, or secure it with floral wire. Then I hot glued the ornament inside the nest. Almost done! Take your book page (mine is in German, so I am not even sure what it says!) and your burlap and your red and white fabric and cut little flags, all the same size. You will then break out the sewing machine and stitch the little flags to your ric-rac, making a cute little tiny mini bunting! If you don't have a machine, you can always hot glue. Attach this to your wreath and hang it for all to see:) You can tie ribbon or burlap around the top if you like, to hang it with. I just used what I had. Tip: If you have a spray topcoat lying around, go over the wreath a couple of times. This will help with shedding. It is fine without too. You may just have to pick up the occasional moss:)
Thanks for viewing my blog. It is just a little creative outlet for this stay at home mom. After last week's sermon at LG, I just wanted to make sure I had the right motivation for doing things....I hope I don't sound like I am bragging on this blog. The only reason I have an ounce of creativity is because that is the way the Father created me and I just want to share ideas with you sweet friends:) And with that I wish you a Happy Valentines Day and a verse that was on my heart today. Thank you Jesus for loving us:)
"Greater love has no one than this, that he lay down his life for his friends." ~John 15:13
-One medium sized grapevine wreath (about $4.00 at Hobby Lobby, but these go 1/2 off all the time) -One bag of Spanish moss (I liked the bright green for this project, also purchased at 50% off)
-One birds nest (they come in a pack of 2 at HL, so you will have more for another spring project:)
-One beaded red heart ornament (30% off in Valentine section)
-red ric rac (.99 in scrapbook section, also 50% off...ok you get the picture....I like 50% off)
-scrap red and white polka dot fabric -old book page -burlap -hot glue and gun
Just take your wreath and work in small sections, applying the hot glue and then adding a bunch of the Spanish moss. Don't be stingy with the moss....it goes a long way. Also, this will make an EPIC mess, so be forewarned:) After covering most of the front with moss ( I skipped the back) hot glue your nest to the inside bottom of the wreath, or secure it with floral wire. Then I hot glued the ornament inside the nest. Almost done! Take your book page (mine is in German, so I am not even sure what it says!) and your burlap and your red and white fabric and cut little flags, all the same size. You will then break out the sewing machine and stitch the little flags to your ric-rac, making a cute little tiny mini bunting! If you don't have a machine, you can always hot glue. Attach this to your wreath and hang it for all to see:) You can tie ribbon or burlap around the top if you like, to hang it with. I just used what I had. Tip: If you have a spray topcoat lying around, go over the wreath a couple of times. This will help with shedding. It is fine without too. You may just have to pick up the occasional moss:)
Thanks for viewing my blog. It is just a little creative outlet for this stay at home mom. After last week's sermon at LG, I just wanted to make sure I had the right motivation for doing things....I hope I don't sound like I am bragging on this blog. The only reason I have an ounce of creativity is because that is the way the Father created me and I just want to share ideas with you sweet friends:) And with that I wish you a Happy Valentines Day and a verse that was on my heart today. Thank you Jesus for loving us:)
"Greater love has no one than this, that he lay down his life for his friends." ~John 15:13
Below are some super adorable Valentines Rylie will be passing out at pre-school. I just have to add the lollipops (it will look like she is holding a giant one). Big thanks to my BFF Dawn for her Illustrator skills in creating these...again, thank you Pinterest for your inspiration:) I may have a slight addiction....
Saturday, January 28, 2012
Better Late than never....
So I figured while it was still January I could squeeze in a post about my Christmas crafts. I made a few things in December, so here are some pics:)
This is a little Christmas outfit for Rylie. I almost hesitate to make holiday specific outfits (although I almost always cave and do it anyway) because of the scarcity of their shelf life. I mean, she may have gotten 4 wears out of this at best. Nevertheless, it is fun to do and my dear friend Dawn came up with this super cute and easy skirt pattern, so I grabbed some cute fabrics and stiched away!
These are a few window displays I did for a local children's store. I decopaged the letters and hung them with ribbons from frames that I painted and distressed. I had ornaments and lights and lots of other fun stuff too!
This is a chalkboard I got at a thrift store and painted. I used my trusty hot glue gun and glued on moss, ribbon and ornaments and wrote this quote that I just love. Now if I could just work on my handwriting....
These are some super cute snowman cookies made from nutter butters...thank you Pinterest!! We took these to Rylie's preschool...
And lastly, my little mini-me modeling her 5th birthday outfit. I make the kids one for each birthday, and I must say it feels good that they can actually get a year's wear out of it! Rylie chose the kitty cat theme for this year's party, so she wanted an outfit to match. And yes, it is January and her birthday was in November! Thus the post title... :)
Thursday, January 12, 2012
Mike & Cyndi's Wedding
This was the wedding my mom and I did for her youngest brother (my uncle) Mike, and his dear bride Cyndi. We had a limited budget so we had to get creative! Our super talented friend Theresa did the catering and my Aunt Kristie made the cake herself! My mom adn I actually bought all the flowers and I made the arrangements and bouquets the morning of the wedding! Holy Time Crunch Batman! I made the little moss "S" and it hung behind the cake table and Cyndi loves purple, so we added splashes here and there. Lots of lights, candles, greenery and lanterns and voila! I also made the framed initials with my trusty cricut machine and printed song lyrics from one of their favorite songs as the backdrop. This makes a great gift/memento! We also decorated the windows and the front of the sanctuary with candles and greenery that I cut from the woods beside my parents home! Simple elegance:) P.S. 9:00 am the day aftet the wedding I became VIOLENTLY ill with a stomach bug....thank you, God, for not letting this happen the day of the wedding:)
Tuesday, January 10, 2012
Why can't I post to my blog?
O.K....I seriously need some help. This has been going on since bfore Christmas. I think Blogger is trying to break up with me. Maybe I am just paranoid, but I can't get anything to post (picture-wise) when I try to upload it gives me an error message and won't post my pics! HELP! I need one of you internet savvy peeps to give me some advice...let's face it, I am technologically challenged!
~Emily
Monday, November 14, 2011
Fall Decorating on a Budget
Need a mini-face lift for fall? Go to your nearest TJ Maxx, Ross or Marshalls and snag a birdcage. They are great for little vignettes....I took a decoupaged letter from Hobby Lobby (around $2) and a few thrift store finds and filled with moss and shredded book pages from old foreign language books that were also thrifted. (Gasp!) I can't read French, so they make pretty decorations! I googled them...no worries they aren't precious rarities:) You can also do this with dollar store books...just paint the edges of the books black before using for an "old" or "vintage" look!
These gems were old brass candlesticks purchased at, you guessed it, thrift stores and garage sales for about 25 cents each! I painted them with spray paint, roughed them up a bit and then applied some dark stain! Adds a pop of color for a few dollars!
Not sure what to do with your Thanksgiving table? Grab some Pumpkins at Hobby Lobby while they are about 66% off and grab a few yards of Burlap with that 40% off coupon. Cut the ends into strips and tie into knots for an instant farmhouse table runner. Grab a few of those brass candlesticks and paint them off white. Any leftover pumpkins? Spray them white too if they are still in good shape! Look around your neighborhood and trim some fresh evergreen, or other pretty greenery and place around your items. Instant table scape for very little cash!
Wednesday, November 9, 2011
Uganda Journey Benefit
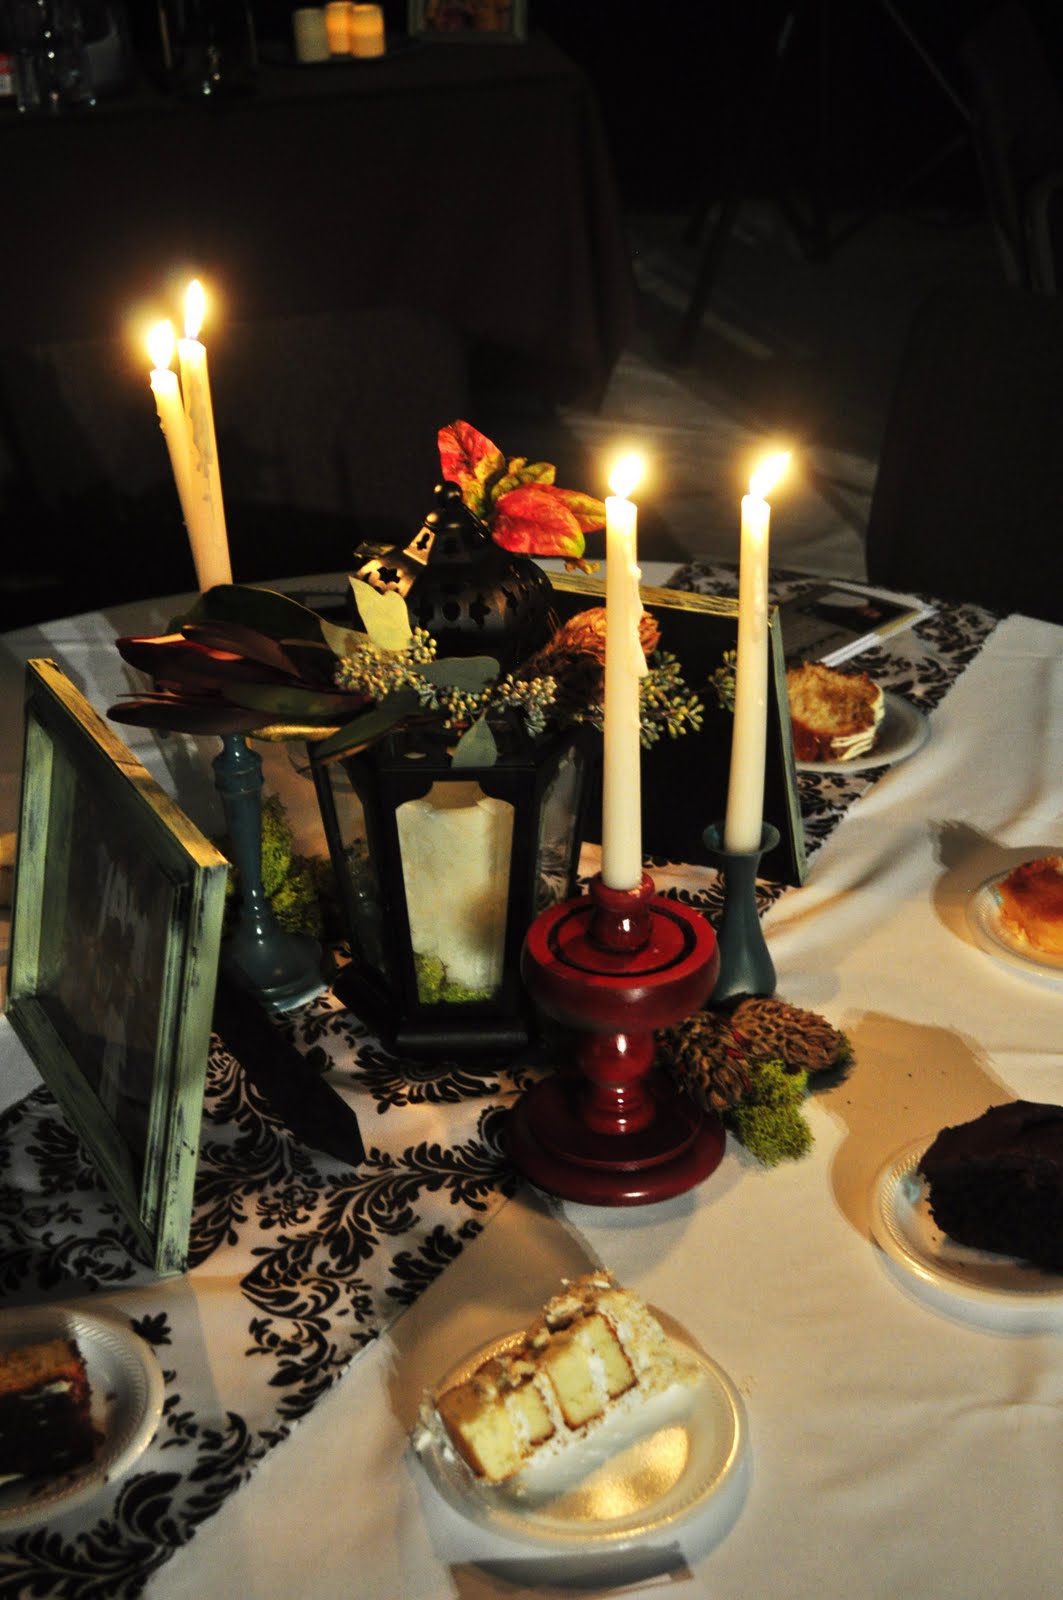
I had lots of fun doing the decorating for a Benefit for some sweet friends who are missionaries in Kampala, Uganda. We had about 20 tables, so fortunately I had some talented volunteers to come and help with the setup. My friend Amanda was in charge of the Benefit and she recruited me for the decor. I met with a local florist and chose flowers for the arrangements, then re purposed lots of brass candlesticks with paint, distressing and a bit of glaze to make them look aged. I painted some old shutters for jewelry display for the Aggie's Arts segment of their ministry. (If you are interested in purchasing some of the handmade jewelry or handbags, contact me. All proceeds go towards helping women in the slums of Kampala and also go towards Kisoro kids, a school there in Uganda for the children). I used lots of candles, greenery and moss with lanterns. Amanda made the frames, with pictures of locals in Kampala, and we placed those on each table. I painted a few pieces for the welcome station, and also for the buffet to hold plates, etc. Lots of fun for a great cause!


Subscribe to:
Posts (Atom)